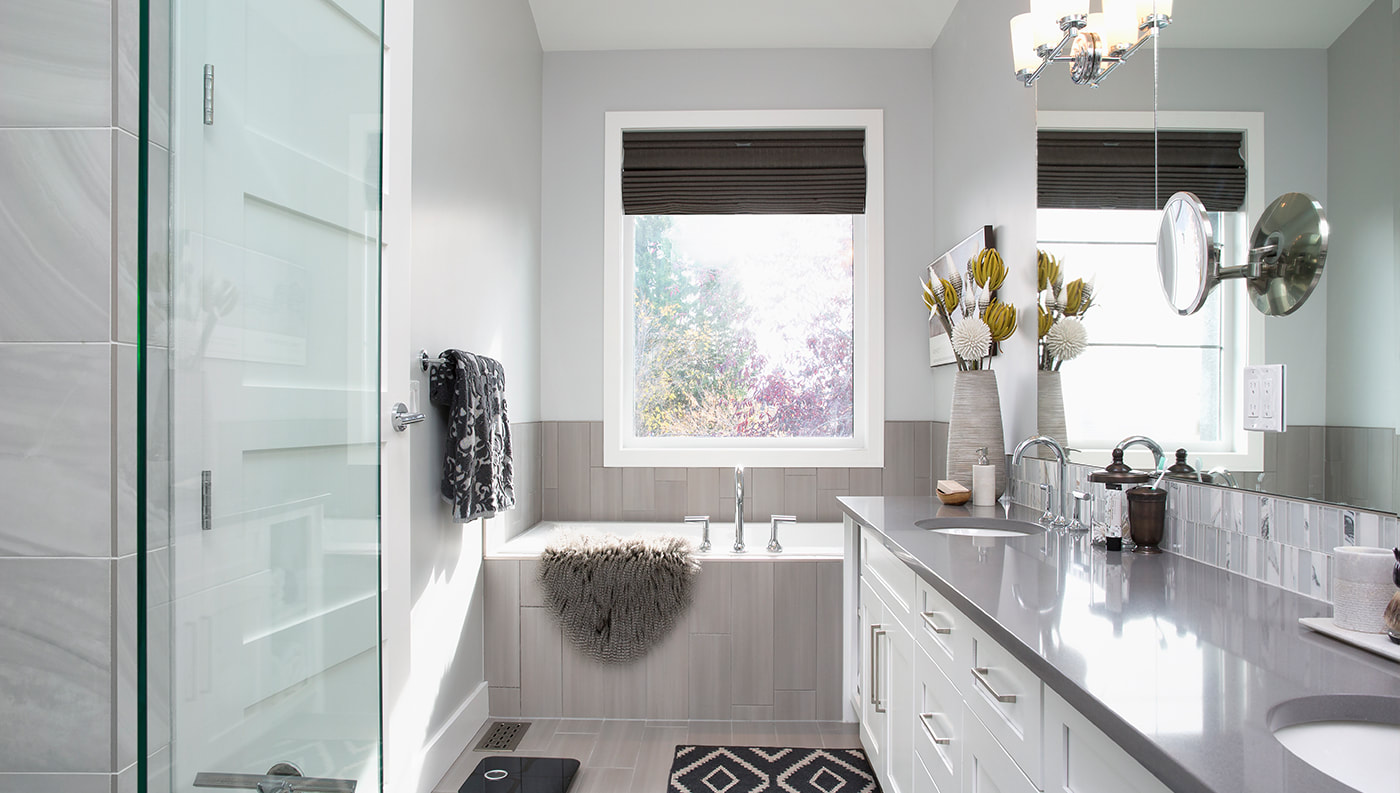
 A little design magic can make even the tiniest bathroom feel spacious.Small bathrooms aren’t the easiest spaces to work with. They’re usually cramped and crowded, with limited natural light and awkward layouts. Whether it’s your powder room or your apartment bathroom that’s cramping your style, here are a few tips for making any small bathroom seem bigger — no wall demolition required. 1. Brighten the room Bring in as much light as possible. Light, bright rooms always feel more spacious than dark and drab ones.
2. Add mirrors Install larger — and more — mirrors than you typically would in a bathroom. The reflected light will open your small space into one that feels more spacious. 3. Streamline storage Keep all storage as flush with the walls as possible, because anything that sticks out will chop up the space and close it in. Install recessed shelving and medicine cabinets instead. 4. Eliminate clutter Nothing crowds a space faster than clutter. A good rule of thumb: If you don’t need it there, store it elsewhere. Pare what you keep in the bathroom down to the bare necessities. 5. Raise the bar Raise your shower curtain bar all the way to the ceiling — it’ll draw your eyes up and make the ceiling seem taller, creating the illusion of a larger space. The same goes for any window treatments. Raising sheer curtain panels to the ceiling also creates the illusion of a larger window, making the small bathroom seem larger. 6. Hide the bathmat Having a bathmat on the floor all the time can make your bathroom feel smaller. Put your bathmats away when you’re not using them to expose the flooring and make the space appear larger. 7. Install a sliding door Swinging doors can take up almost half the room, depending on how small the space is. A sliding barn door or a pocket door won’t encroach on your bathroom’s already limited real estate. 8. Think pedestal sink The added bulk of a full vanity takes up valuable space, so try a pedestal sink instead. You may not have a place for soaps or towels on the vanity, but there are plenty of wall-mounted solutions perfect for bathroom accessories. 9. Choose light-colored flooring Even if your walls and ceiling are light and bright, a dark floor will negate their effect and close the space in. Keep the flooring light to create a space with a bright and open flow. 10. Go frameless, clear and cohesive in the shower Clear glass shower doors make the room appear larger, while frosted glass breaks up the space and makes it seem smaller. The same goes for a frame around the glass. A frame can make the area seem choppy rather than smooth and open. Additionally, install the same shower tile from floor to ceiling. The seamless look from top to bottom adds cohesion and openness. Just a few changes to your small bathroom can make dramatic differences in how open it feels. Once you’ve tried these tips and tricks in the bathroom, apply them throughout your home! It’s all about creating the illusion of space.  On Point Homevestments
0 Comments
 No matter your budget, there's always an upgrade or two that'll up the resale ante.Whether your home improvements are for you or potential buyers, consider their impact on your home’s potential resale price before picking up your toolbox (or the phone to call a contractor). A brand-new kitchen or bathroom will undoubtedly wow potential buyers, but there’s no guarantee you’ll recoup the money you put into those pricey remodels. To help you navigate the choices that lead to the best return on investment, we asked two industry experts (and one enthusiastic DIYer) to weigh in. Kitchen renovations “Renovating the kitchen is always the biggest way to add value to your home,” says Grace Fancher, real estate agent at Kansas City firm Sarah Snodgrass. “People love to cook, and everyone tends to gather in the kitchen. If you add seating, such as an island with barstools, buyers go crazy for that.” A full remodel is a major investment, but smaller projects make a big difference if you can’t — or don’t want to — go all out. “Nicer appliances really stick out to potential buyers — even if you’re planning to take them with you,” Fancher says. She also suggests replacing tired finishes with fresh, neutral materials. “You don’t want to be too trendy, but you want it to look up-to-date,” she says. “Everyone loves clean, white subway tiles now, but they’re really a timeless look.” Replacing dated countertops (quartz is your best bet, according to Fancher) and flooring is also worth the time and money. Bathroom updates The smallest rooms in the house can have a big impact on its value, so Fancher suggests adding a second bathroom or upgrading existing ones so your home features at least two full baths. Joe Monda, co-owner of Seattle-based general contracting firm Promondo, agrees. “People are spending more on upgrading their houses before listing them,” he says. “They really want to maximize the potential house value.” But if you’re remodeling a bathroom just to put your house on the market, keep it simple. “Most people don’t want to pay for upgrades, so you want it to be a neutral space that doesn’t look straight out of the big DIY warehouse stores — even if it is,” says Fancher. She adds that an easy solution is spending a little more on details, like high-quality towel bars and upgraded hardware for those big-box store vanities. Not in a position to remodel? “Re-grouting tile, or even just using one of those grout paint pens, gives any bathroom a fresher look,” says Sharyn Young, a self-proclaimed DIY addict from Minneapolis. Lighting upgrades “The brighter a room feels, the bigger it looks,” says Fancher. “And when you’re selling, you want every space to look as big as possible.” She recommends replacing flush-mount ceiling lights with recessed and/or pendant lighting — a relatively cheap upgrade that looks modern and makes a huge impact. “LED lighting has changed everything,” says Young. “There are so many readily available, inexpensive options now that are easy to install. I added Ikea under-cabinet lighting in the kitchen of my last house, and I was amazed at how that one simple upgrade made the space feel larger and cleaner.” Fresh paint Like lighting, a new coat of paint can also make a space feel cleaner and brighter. Stick to neutral shades, such as light gray and beige, and if you don’t have time or budget to do the whole house, start with the living areas you see when you first walk in. An even quicker fix is refreshing just the trim. “Beat-up, dirty trim can give buyers a subtle impression that the whole house is dingy,” Fancher says. “Repainting gives a sharper look and shows the buyer that you’ve taken care of the house.” Landscape improvements “A lot of people overlook how important landscaping is, especially when you’re selling in the spring or summer,” says Fancher, adding that you can increase curb appeal by just putting down new, dark-colored mulch, if you don’t want to spend a lot of money on planting. Monda suggests paying special attention to the entry. Repair or replace any damaged stepping stones, concrete paths, and porch plants, then give the front door a fresh coat of paint and add some potted plants. “You want people to be excited to walk in the door,” he says.  On Point Homevestments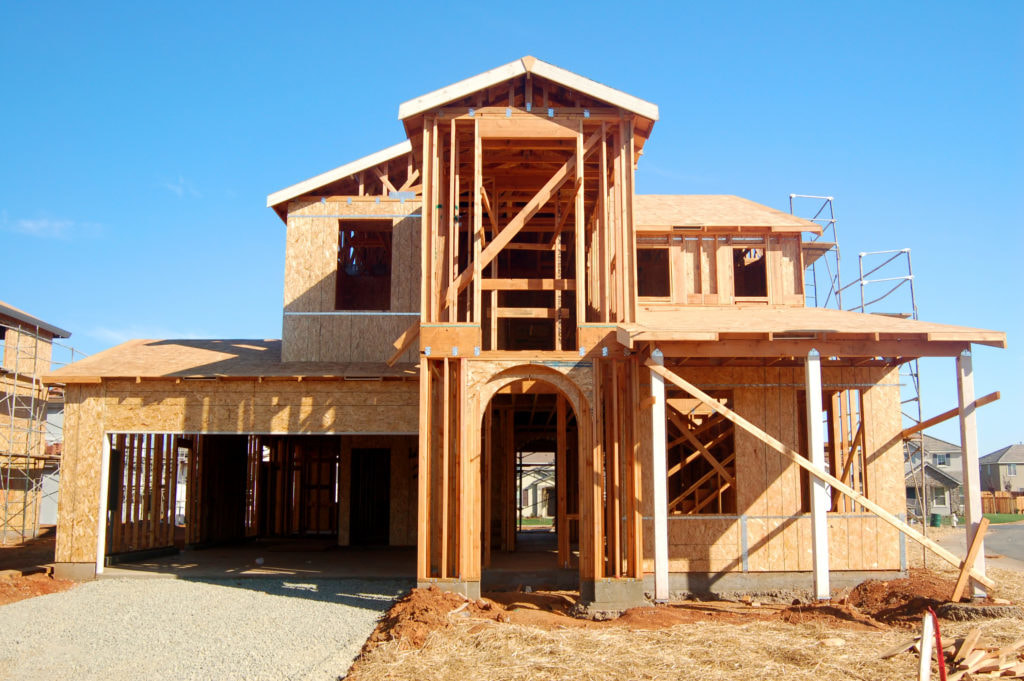 Do your homework to get the best deal on a brand-new home.If you’re in the market for a brand-new home, you’ve got a ton of options. Sales of new homes surged to an eight-year high in 2015, according to data from the U.S. Department of Housing and Urban Development and the U.S. Census Bureau, and single-family production is estimated to reach 840,000 units in 2016, an 18 percent increase over 2015, according to the National Association of Home Builders (NAHB). Unfortunately for home buyers, new residential construction is coming at a steeper price: Last year the average price of a new home jumped to $351,000, up $100,000 from 2009, reports the NAHB. Nonetheless, there are still ways you can save when buying a new home. It’s like shopping for a new car: You need the right strategy to nab the best deal. Ask prospective builders these six questions in order to find the right home at the right price. “What financial incentives do you offer for using your preferred lender and title company?” The bad news: Production builders are often reluctant to set a precedent for negotiating sales prices. (Custom builders tend to be more flexible.) “If a new home is listed for $370,000 and it sells for $360,000, the next buyer in the development is going to want to pay that lower amount,” says Craig Reger, a real estate broker at Keller Williams Realty in Portland, OR. However, many offer handsome incentives to buyers who use their preferred lender and title company. Some may even knock off up to $10,000 in closing costs, says Peggy Yee, a supervising broker at Frankly Real Estate in Vienna, VA. Others will sweeten the deal by negotiating prices on finishes, such as upgrading carpet to hardwood floors. You should still shop around and get quotes from at least two other lenders before making your decision. But don’t just pay attention to the interest rates. “You need to compare each loan estimate’s terms to make sure you’re getting an apples-to-apples comparison,” says Chris Dossman, a real estate agent with Century 21 Scheetz in Indianapolis. “Which are the standard finishes?” When you tour a development’s model home, keep in mind that you’re previewing a high-end version of the standard home. “The model has all the bells and whistles,” says Dossman. Therefore, you need to find out from the builder which options are standard, which options are upgrades, and what each upgrade costs. One way to cut costs: Move into the home without an upgrade, then hire a contractor to do the work. “Builders charge a huge markup on certain finishes and products,” says Reger. “The builder might charge $4,000 to $6,000 for a high-performance air conditioner, but you may be able to get another company to install that same unit for as low as $2,500.” Granted, opting for the latter means you’ll probably need to pay the contractor in cash. “For some people, the benefit of paying the builder to do upgrades is that they can roll the costs into their loan amount,” Reger points out. “What are your long-term plans for the community?” Depending on the size of the land, the builder might be planning several subdivisions. This could impact your decision to buy. For example, let’s assume that only a few homes have been built and sold. If the developer plans to construct an additional 50 homes and you’re one of the first people to move into the neighborhood, you may have to deal with loud construction crews for several months. There’s also the risk that the builder loses funding and another company takes over the development. Dossman advises proceeding with caution: “If the builder changes and a lower-quality builder takes over, that could affect the value of your home.” “What are the homeowners association rules and regulations?” Each homeowners association (HOA) has its own Declaration of Covenants, Conditions, and Restrictions (CC&Rs) and bylaws. Get these from the builder and review them carefully. “I’ve seen HOAs that don’t allow storage sheds in the backyard, solar panels, or private fences,” says Reger. In most cases, the HOA can assess a homeowner penalties for infractions, and some associations are more restrictive than others. Also, look into when you’re required to start paying HOA dues. Many builders cover the costs until at least 50 percent of the homes in the development are sold, says Yee. “What warranties do you provide?” Most builders offer a one-year workmanship warranty and a 10-year structural warranty, says Reger. Make sure the warranties you receive explicitly state what is and isn’t covered, and what the limitations are for damages. You should also receive manufacturer’s warranties on the washer and dryer, hot water heater, air conditioner, kitchen appliances, and roof. “Can you connect me with some of your past clients?” Always check references when vetting home builders, says Dossman. Ask past clients questions such as, “How responsive was the developer when you expressed concerns?” and “Would you use the builder again?” Caveat: Most builders will only provide glowing references, so you should still scout out some past customers on your own. You can find these people through reviews on Angie’s List, or knock on doors of homes in the neighborhood that have already been built. Wondering if new construction is right for you? Search new construction listings, and get more home-buying tips and resources to help you decide.  On Point Homevestments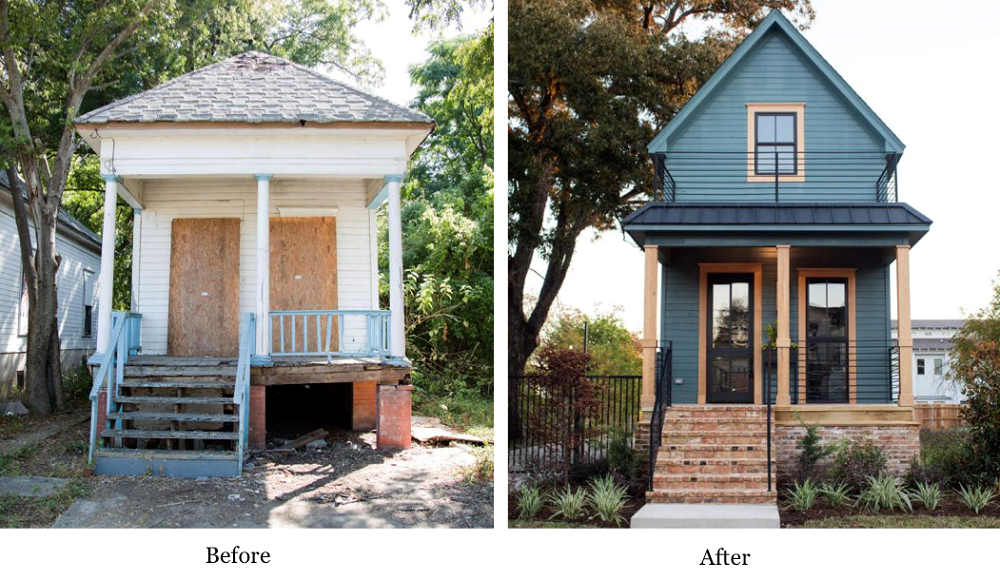 What if your dream home just happens to have ancient wiring and a cracked foundation?So you’ve set your sights on a home that, to put it mildly, needs a little repair work. The stairs are creaky, and you’ve noticed a leak (or three). Still, your mind is made up. What’s a love-struck home buyer to do? If your heart is set on a fixer-upper, this advice from real estate experts can help you make that “needs-work” house a home. Check the zoning “Any municipality has zoning districts, and you need to know what uses are permitted,” says George Vanderploeg, a luxury real estate broker with Douglas Elliman in New York. Knowing the zone is important because it will tell you what you can and cannot do to the home. For instance, when interiors photographer Josh Gibson decided to renovate his 19th-century cottage in Beaufort, SC, he had to contend with the historic district landmarks commission, which required hours of research and visits downtown. Among the many requirements he had to adhere to were installing single-pane windows and maintaining the home’s unique brick-pier structure. To research your prospective home’s zoning requirements, you can visit its municipality’s website, or arrange to meet with a staff member, who can walk you through the legalities. Bring in a home inspector Once you’ve made a verbal agreement to buy the house and are waiting for the contract to be drawn up, you’ll want to hire a home inspector. A home inspector will look for structural issues and advise you on things that may or may not need to be replaced, such as plumbing, electricity, and roofing. Your broker can refer you to an inspector, but it’s important that this person not be biased, as you’ll need an objective opinion. With this in mind, Vanderploeg advises finding someone who will work for you — not for the broker or seller. Be sure to set aside about an hour or two to walk through the building with the inspector and ask questions. “This allows the buyer to get to know the house really well before they buy it,” Vanderploeg says. Home buyers tend to ask questions about asbestos and termites, but Hal Einhorn, the principal inspection consultant for Old House Inspection in New York, says it’s equally important to ask about the “general age of certain systems,” as those will indicate when they’re nearing replacement. A 26-year-old boiler, for instance, is likely to go kaput soon, whereas a newly-installed air conditioning unit probably won’t be a problem for the next 20 years. Depending on the home’s location, you may also want to ask about issues specific to its region, Einhorn says. In New York City, for instance, where the water mains tend to be dated, you’ll want to clarify that the one in your coveted home isn’t made out of lead. And with today’s families using more electricity than ever, you’ll need to find out if the amount of power coming to the house is suitable, or needs an upgrade. Doing a little research online can be helpful. Another important topic to bring up is any work you’re preparing to do, like upgrading the bathroom or turning a one-bedroom home into a two-bedroom, Einhorn says. Find out the agency requirements, and if the home is in a landmarked district, make sure you know the ramifications. Will your project require filing documents, and if so, what is the process? Hire an architect and/or contractor Hiring an architect is important because you’ll want their take on what you can do from a design perspective, says Vanderploeg. The architect will also be able to point out the home’s load-bearing walls, which will determine whether they can be moved around or not, says Scott Oyler, a broker with Coldwell Banker in Cincinnati. When hiring a contractor, be sure to do your homework so you find someone you can trust. “I’ve heard of horror stories where contractors left in the middle of the job and never came back,” Oyler says — so make sure your crew has good references. Also be sure to recruit more than one, he adds, as you can never have too many opinions. Research tax incentives Depending on where you live, you may eligible for a tax abatement, a tax credit for homeowners who improve their property’s value, Oyler says. Philadelphia offers one; Cincinnati does, too. Check to see what’s available in your area. If you decide to buy and improve a fixer-upper, have patience. Once the sawdust clears, you may just find the home of your dreams.  On Point Homevestments Save some room in your budget for expenses after move-inBy the time you get the keys to your new construction home, you might feel stretched thin in the finance department. From earnest money and design center upgrades, to closing costs and moving expenses, buying a brand-new home is never cheap. As you take a look at the costs on the horizon, it’s wise to look a little past your closing date. There are a few post-closing costs that are unique to brand-new homes and some that are familiar to all new homeowners. Set aside a little money for these expenses now, and it’ll be smooth sailing once the “sold” sign is out front. Appliances Unless you’ve negotiated a washer and dryer into the price of the home with your builder, your new laundry room will likely be a big empty space when you move in — no washer and dryer to be found. Many builders don’t include a refrigerator either, opting instead to let homeowners choose a style that suits their needs. Here’s a tip to ease your wallet woes: Start shopping appliance sales once you know your approximate close date. Many appliance stores will let you purchase ahead of time to take advantage of a good price, then delay your delivery until you move in. Utilities If you’re upgrading to a larger home, your utilities will likely increase, especially heating and cooling. And if you’re moving to a new city or a location with a different utility company, you may have to pay a deposit to start service. If you’re interested in services like cable, satellite TV, or Internet, you may have to install some equipment that would already be installed if you were buying a pre-owned home. Window coverings Look at all those big, beautiful windows in your new home! And then notice that they’re bare — no blinds or curtains in sight. Most new homes do not come with window coverings, and they’re definitely something you’ll want to quickly look into when you move in. There are better ways to introduce yourselves to the neighborhood than through wide-open windows — or bed sheets pinned up for privacy. Furniture There’s nothing more exciting than picking up some great new furnishings and decor for a brand-new space. You may have pieces that worked well in your old space but don’t fit your new home’s layout. Or maybe you have a new guestroom to furnish, a deck that is begging for patio furniture, or beautiful hardwood floors that need area rugs. Set aside some money now so you can start decorating right after move-in day. Landscaping Did you know that some builders only landscape the front yard, leaving the backyard unfinished and unfenced? And, if your new neighborhood has a homeowner’s association, the rules may require you to finish your yard within a certain time period. That means you foot the bill for landscaping your new home’s yard, and whether you do it yourself or hire a professional, it’s still an expense you shouldn’t overlook. Setting foot in your brand-new, just-finished home is an exhilarating experience, and something you won’t soon forget. With just a little planning and saving in advance, you can spend more time making your new house a home, and less time stressing over how you’re going to pay for it all.  On Point Homevestments Transform your standard-issue rental kitchen with these tips.Is there some kind of law that requires rental apartments to supply no more than a single square of kitchen counter space to each unit? Between the white walls, scarce and often outdated cabinets, and a lack of amenities, it’s rare to find a solid kitchen in the world of yearlong leases. But no good makeover starts with a beautiful subject, right? All you need to transform that bleak little kitchen into a well-designed, functional space is a bit of imagination, some basic home maintenance skills, and a few solid pieces. Here’s where to begin. Donate first Before moving into your new space, make sure to get rid of all those things you don’t need anymore. Have you actually used that discounted bundt pan in the past year or two? If not, donate to your favorite local charity shop. Someone else might get use out of it, and you’ll be saving yourself from more clutter in your new home. Think vertically Vertical storage is a tried-and-true method of using space, and the kitchen holds some unique opportunities for making the most of it. Hanging pot racks, magnetic knife strips, mounted dish-drying racks installed above the sink, and rods with hooks for towels, aprons, small tools and oven mitts are all excellent ways to keep clutter in its place — and keep the surfaces and lower area of the room free. Find beautiful cleaning tools The ugly truth is that a lot of everyday items just make sense to keep out — but that doesn’t mean they have to be such an eyesore. Skip the plastic and get yourself a classic wooden broom, natural fiber dish brush and a glass soap dispenser. These items don’t cost much, but they add a softer look while also getting the job done. Tap into change Just because your place didn’t come equipped with a dishwasher doesn’t mean you have to suffer. Installing a quality faucet with a pull-down sprayer can make your chores less of a chore (and, as long as you swap it back before you move out, it shouldn’t violate your rental agreement). Have space and the budget for something more? Portable dishwashers are a massive timesaver. From small countertop models to wheeled butcher-block-top options, there are sizes that fit into almost any space and require nothing more than your standard sink to function. Live the island life A kitchen island is a versatile tool for almost any space — even the tiniest micro apartments! Whether you choose a larger center-of-the-room-style piece or a small butcher-block number, these additions create more counter space and storage, all in one piece. Bonus: If your island has wheels, it can serve as a portable bar for your next party. (Hey, if we can call bingeing our favorite shows with a few of our closest friends a “party,” so can you.) Light it up Another timeless tip: Good lighting is everything. If your kitchen is dedicated to getting things done and starting your day, invest in cool lighting — the kind that washes everything in a bright, sunlit glow. A refreshing, cooler light wakes us up and creates an invigorating feeling. If you’re more of a romantic and enjoy taking your time in the kitchen, keep relaxing, warm lighting around so that you can let the day melt away as you sip your merlot. For those who prefer a bit of both, app-enabled bulbs can customize the mood for any occasion, and some even use every color of the rainbow. Think (temporarily) BIG If there’s one common complaint about renting, it’s the stark white walls. Removable wallpaper adds a touch of personalization and won’t break the bank — or at least, it doesn’t have to. To keep costs low, stick to one accent wall. Finding a large-scale print will make the space feel larger, and layering a sizable mirror on top will maximize the look and any light. Curate unique displays One of the best ways to keep an assortment of oddly shaped kitchen items is to dedicate either one section of the room (think: the top 12 inches of the walls) or one wall to showing them off. Whether it’s your grandmother’s antique creamer collection or the jumble of cookie cutters that won’t fit into your drawers, making them into a vignette adds a layer of personalization to your space while also providing covert storage in plain sight. Easy-to-install hooks or some simple shelves are great ways to achieve this solution. Keep it alive Every room deserves a plant. Not only do they look good, but they also improve the quality of the air around them. If you don’t have the floor or counter space to spare, a hanging plant will do the trick. No natural light in your kitchen? Or perhaps you’re better at killing plants than keeping them green? No matter — there are plenty of realistic artificial plants these days, which means everyone can benefit from the organic shapes of ferns, succulents and the ever-popular fiddle-leaf figs. Have pets? Make sure to check the toxicity of your plants before choosing their placement. No matter how uniquely challenging your space might be, there are solutions waiting for you to find them.  On Point Homevestments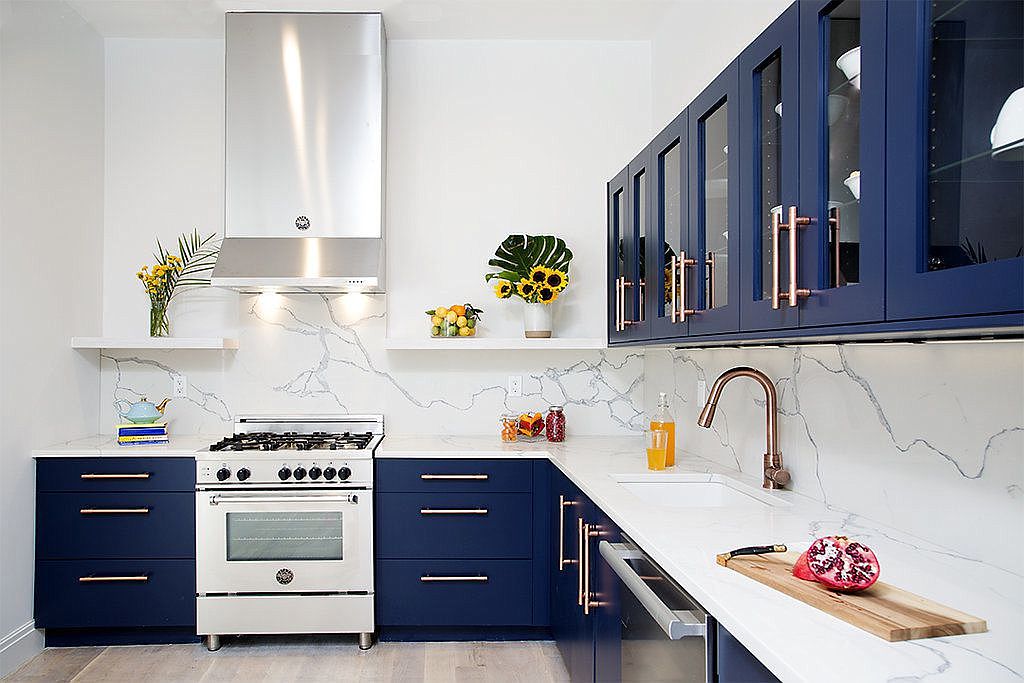 Thought that all-white kitchen was timeless? Think again.Home design trends come and go — and this year, one look that’s on its way out could actually cause your home to sell for less. Here’s a look at five design trends you’ll be seeing more of in 2018, and three it’s time to kiss goodbye (especially if one of your New Year’s resolutions is to sell your home). Trending in 2018 Floral prints Interior design experts predict floral prints in bold, contrasting colors will make a big comeback in this year, particularly on large billowing fabrics, like drapery, as well as chairs and throw pillows. Statement floors Forget statement walls — this year will be about statement floors. From bold colored geometric tiles to soft herringbone-style hardwoods, expect to see fab floors everywhere, especially in bathrooms and laundry rooms. They’re a great way to make a small room pop, without adding clutter. Light wood cabinets Homeowners are gravitating toward medium and light wood cabinets, particularly with flat fronts and clean lines. The warmth, texture and natural element wood cabinets add help make the space feel more inviting. Warm neutrals From warm reds to caramel browns to soft beige, moodier color palettes, both on walls and in artwork, will be popular. Matte metal hardware What kind of drawer pulls and light fixtures do you want with those wood cabinets? Matte metal! Homeowners are moving away from shiny silver- or gold-accented kitchen hardware — they can make the space feel cold. 2017 fads to forget All-white kitchens This look has been popular for a while, but it’s on the way out, according to the Home Trend Forecast. Expect to see more color in kitchens next year, especially if the homeowner is planning to sell. Data shows homes with blue kitchens sell for $1,800 more than homes with white kitchens. Adding color and texture in the kitchen can help make the space feel more inviting. “While homes with all-white kitchens can be beautiful in photos, they are hard to keep clean and they may sell for less money,” says home design expert Kerrie Kelly. You’ll see designers and bloggers painting their kitchen islands navy blue or deep red (maybe even purple!) or using white countertops to contrast with medium or light wood cabinets. Bar carts While perfectly staged bar carts look beautiful, most people don’t use theirs every day. Instead, the carts take up space and collect dust. But don’t get rid of your cart just yet! Experts predict a shift toward coffee carts, which can be equally trendy, but far more practical. Succulents Succulents are easy to care for and relatively affordable, but so many other vibrant indoor plant options are out there. Nobody’s saying to toss out your beloved Haworthia, but do consider incorporating other plant varieties into your home — perhaps a palm or hearty fiddle-leaf fig.  On Point Homevestments Does your home offer any of the perks some buyers will pay more for?To understand how much your home is worth, you have to know what affects its value. The Zestimate home value is Zillow’s tool for extrapolating the real market value of your home, based on existing home-related data and actual sales prices in your area. Thousands of data points correlate with home values and sale prices — some of which are obvious (like the condition of the home) and some that aren’t. Here are several surprising things that can affect either the existing value of your home or the price someone is willing to pay for it, all based on data. 1. Proximity to a Starbucks How far do you have to drive to get a Frappuccino? If the answer is “not that far,” you’re in luck. A 2015 Zillow report found that, between 1997 and 2014, homes within a quarter-mile of a Starbucks increased in value by 96 percent, on average, compared to 65 percent for all U.S. homes, based on a comparison of Zillow Home Value Index data with a database of Starbucks locations. To evaluate if this effect is isolated to Starbucks, the research team looked at another coffee hot spot (one with particular pull on the East Coast): Dunkin’ Donuts. The data showed that homes near Dunkin’ Donuts locations appreciated 80 percent, on average, during the same 17-year period — not quite as high as homes near a Starbucks, but still significantly above the 65 percent increase in value for all U.S. homes. 2. Blue kitchens and blue bathrooms Beyond America’s obsession with curb appeal, what’s inside your house counts a lot too — especially the colors you paint the rooms (particularly the kitchen). According to Zillow’s 2017 Paint Color Analysis, which examined more than 32,000 photos from sold homes around the country, homes with blue kitchens sold for a $1,809 premium, compared to similar homes with white kitchens. Blue is also a popular bathroom shade. The same analysis found that homes with pale blue to soft periwinkle-blue bathrooms sold for $5,440 more. Walls painted in cool neutrals, like blue or gray, can signal that the home is well cared for or has other desirable features. 3. Trendy features Joanna Gaines’ aesthetic is permeating more than just your YouTube search history. Zillow listings mentioning the shiplap queen’s favorite features — like barn doors and farmhouse sinks — sell faster and for a premium, according to a 2016 Zillow analysis of descriptions of more than 2 million homes sold nationwide. Listings with “barn door” in the description sold for 13.4 percent more than expected — and 57 days faster than comparable homes without the keyword. Meanwhile, listings touting “farmhouse sink” led to a nearly 8 percent sales premium. Sellers can use the listing descriptions to highlight trendy details and features that might not be noticeable in the photos. 4. How close you are to a city If you own a home in a major American metropolitan area, you’re most likely sitting on a significant (and rapidly appreciating) financial asset. Case in point: Home values in the New York, NY, metro area are worth $2.6 trillion, per a recent analysis. The average urban home is now worth 35 percent more than the average suburban home. Since 2012, the median home value in urban areas has increased by 54 percent, while the median home value in suburban areas is up just 38 percent.  On Point Homevestments In the simplest sense, developed land has been fully prepared for home building while undeveloped land has not. Each has advantages and disadvantages. If you’re thinking about building your home on undeveloped land, be sure to consider the additional work and expenses. Are We There Yet? One of the most important things that a developer does with raw land is bring roads onto the site and connect those roads to the public right-of-way. Lots are usually located adjacent to the new road and have direct access to it. If the subdivision remains private, the homeowners will maintain the roads but often they’re deeded to the city and maintained by the municipal service department. Vehicular access to undeveloped land can be more difficult, although isolation might be one of your primary goals in choosing a rural location. You’ll almost certainly spend much more to build an access road back into the site (I can recall several “driveways” that are more than one-third of a mile long) and you won’t have city snowplows to clear it for you. Red Tape and Green Paper Buying a lot in a subdivision means buying into additional layers of government regulation including building departments and homeowner associations. Both groups will have a say about the size, location, design, types of exterior finishes, and maintenance of your house. Municipal building departments usually hold builders to a higher standard of construction quality than rural departments – a definite benefit to the homeowner – but that can mean higher construction costs, too. Subdivisions also usually have minimum house size requirements, so your home might even end up being larger than you want. On a rural property you’ll have much greater freedom to decide what your home looks like, what it’s made of, and how it’s arranged on the land. And with that design freedom comes more control over the costs of construction. Because the options are far less limited, undeveloped land is where most truly unique custom home designs are built. Power to the People The development of a lot in a new subdivision typically includes bringing all utilities onto the site, where the new house is easily connected to them. Electricity, gas, water, and sanitary sewer services are available at the edge of the property, ready to be used. Undeveloped property won’t have water and sewer taps on site. In fact, there may be no utilities anywhere nearby. Building on undeveloped land usually means providing your own private septic system and water well, installing a propane storage tank for gas appliances, and bringing electric service lines in from a distance – maybe a very long distance. Can You Dig It? By the time a subdivision is ready for construction, the developer’s engineers have tested the soil and graded the land for proper drainage. You’ll have access to information about the possibility of sub-surface conditions that might affect your construction plans and in many cases the developer will take some responsibility for the site’s suitability for building. If you want the same information about your rural property, you’ll have to order and pay for it yourself. Your county extension service can provide some of this information but it may not be recent, or specific to your site. If you discover bad soil or underground rock in your building area, you’ll have no avenue for redress except your own pocketbook. More Than One Kind of Value A house in a subdivision may have a temporary price advantage over a “stand-alone” home, since its value will be related to the selling prices of other homes in the area. If you value predictable price appreciation, closer neighbors, and want less “hands-on” involvement in the creation of your house, you’ll probably find your dream home in a development. The majority of American home buyers do just that. Building on undeveloped land will require more from you, your architect, and your builder. But if you’re willing to assume the risks of undeveloped land; if you’re interested in a truly custom home design; if you want to be more involved in the creation of your home, you might find your piece of paradise somewhere a little further outside of town.  On Point Homevestments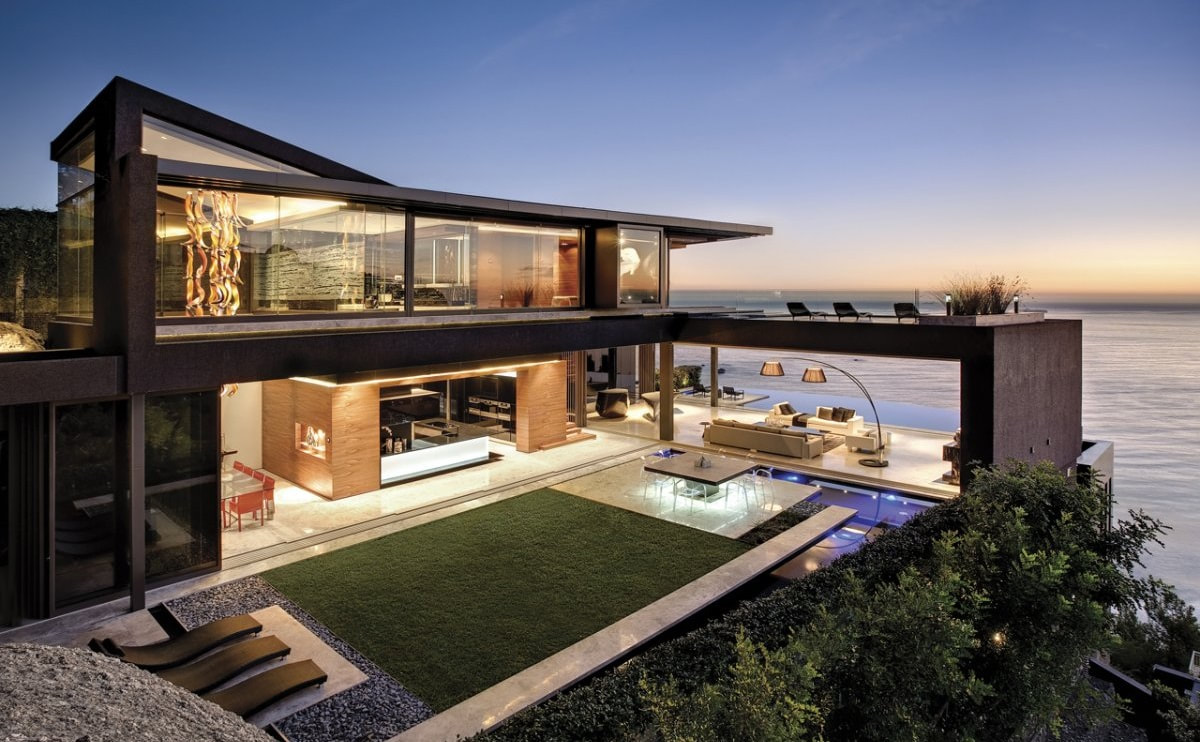 Great home design always starts with the site – a truly special home is never designed first, then placed on the property. How do you evaluate a site for your house? How do you find the right part of the site to build on? Start with the four “S’s” – Slope, Sun, Soil, and Sewer. Slope The slope of the property can have a big effect on the cost of your project – a house placed on a slope will most definitely cost more to build than a house on a flat lot. Does your house have to be placed on the slope? Perhaps it can be placed at the top or bottom – taking advantage of the views from the slope but not incurring the costs of building there. Many owners of sloping lots want to take advantage of that situation by including a “walk-out” basement in the design. It’s one way to increase the space in your house for a relatively small cost. The steepness of the slope will partly determine how much excavation and/or fill is necessary to create the walkout. Homes on sloped lots often require more (read: costly) gravel backfill material at the foundation; they might need expensive retaining walls to create a flat area for a driveway or hold back soil at the walk-out; and they usually have a full basement – whether you want it or not. Here’s the bottom line – carefully analyze (with the help of your design professional) the impact that your sloped lot may have on your design; design a house that’s appropriate for the lot without unreasonably expensive construction techniques. Sun Many homes are designed with the primary family living spaces at the back (kitchen, breakfast room, family room). These are the rooms you want sunlight in; the rooms with all the expensive windows. And you’ll get that sunlight through those windows, too – if the back of the house faces more or less south. That’s where the sun is, remember? If your lot is on the south side of the street, great. But what if your lot is on the north side? All that living space, all that glass, isn’t going to get any direct sunlight at all. Or worse, your lot faces east, and the afternoon sun pours through that wall of west-facing glass like a blast furnace – heating up the house and fading the furniture and carpeting. Since we’re talking about sunlight, now’s a good time to bring up the subject of energy consumption. Houses are designed to keep heat in, or to keep heat out, depending on the season. The easiest and least expensive way to keep heat out of the house is with proper orientation of the windows and doors. The easiest way to keep heat in is to reduce the number of windows. So, pay close attention to the number and location of windows in your design. A properly oriented plan can save you a lot in fuel bills and give you a lot more enjoyment of your house and your building site. Soil It’s amazing, every time a backhoe starts a new house foundation, how different soils can vary from one building site to another. From loose sand to solid rock and everything in between, and sometimes all on the same site! Soil type can have a big impact on the cost of construction. Even if you know a lot about the underground conditions on your site, it’s a good idea to keep a little cash in reserve to deal with potential surprises lurking under the turf. How much do you know about the soils on your home site? It’s relatively easy to learn the basic characteristics from your County Extension Service or local building department. You might also contact builders and excavators with experience in the area and ask them what they’ve encountered on other projects they’ve built near you. Some types of foundation systems that are popular in one region are unheard of in others. Typical practice in many areas is poured concrete walls — a potentially expensive option if your plans call for concrete block. It’s important to know what foundation systems are common where you’re building. But even a house with the proper type of foundation for your site may need to be specifically engineered to accommodate the local soils, and the local building department. Soils drain and retain water differently, and soils have vastly differently capacities to bear structural loads. In most areas, you’ll have to show the building department that your foundation is designed for the local soil conditions. Sewer The Plumber’s Credo – “everything flows downhill” is extremely important to remember when designing your home. On a developed lot, the municipal sanitary sewer line is buried near the front (usually) of the lot. The height of this pipe will determine the depth below grade of the basement slab since the effluent from the house must “flow downhill” to the sewer line. An undeveloped lot is one where the utilities – electricity, water, gas, and public sewer – aren’t brought from the street to the buildable area of the lot. On larger undeveloped properties there may not be any public sanitary sewer to connect to at all. On such a lot, you’ll need some type of private sanitation system. Several types of private sanitation systems are in use today including the traditional septic tank and leach field, aeration systems, and “mound” systems. They can vary widely in cost, and not all health districts allow all types. The choice of system will also be heavily weighted by the soil type and slope of the lot, and the available area(s) for the system. A typical leach field system will require a large clear area for a primary and second field. Since a private sanitation system is more expensive than connecting to a public system, the cost isn’t typically considered in the “base” cost of building a house. A private sanitation system is usually an “extra.” Slope, Sun, Soil, and Sewer – keep these in mind when selecting a property to build on and when designing your home and you’ll have a more successful project!  On Point Homevestments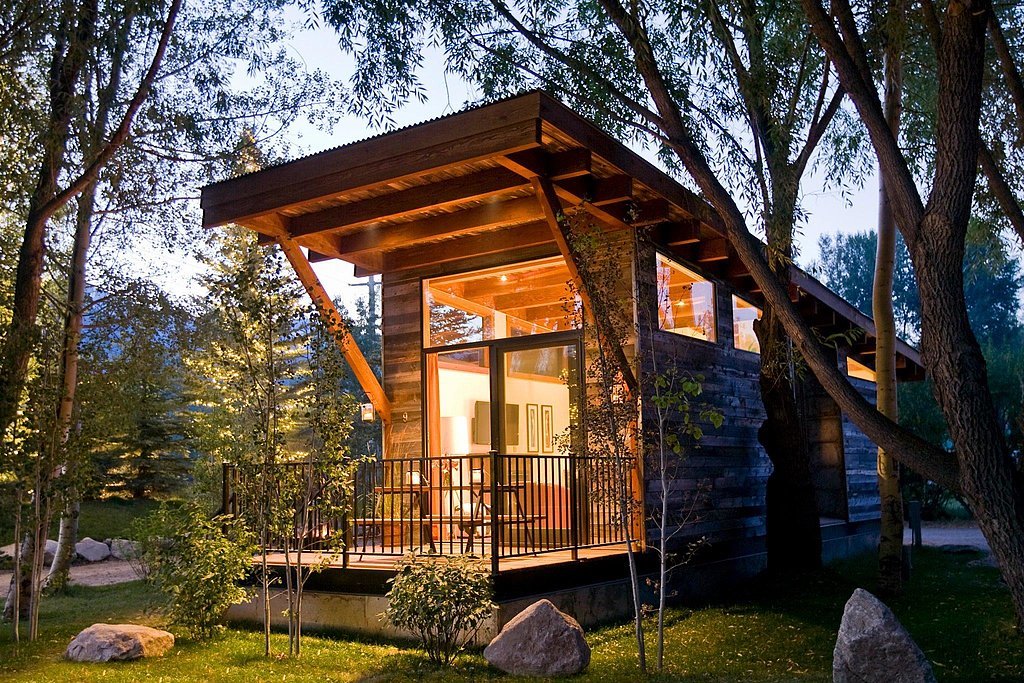 Looks like efficiency is the name of the game and costs are kept to a minimum because there’s simply nowhere to put additional items. Apartments appears well appointed and seem to suit your needs just fine- – for now. It may be a different story when the little one starts to run around. Tried to put the concept of a small living space into the context of the home we currently have. 265 sq ft. is a little smaller than our kitchen and dining room combined. There is no doubt that living in a space that small would take some compromise. First compromise would be that we could only have 1 computer, no more of the networked, geeked-out gaming sessions that we enjoy currently. Second, no more letting the laundry pile up before it gets addressed. And once it is done, it will need to be put away immediately, unlike these days where it sits in the basket for days. Third, if you come to visit, stay in a hotel. Sorry friends, we love you, but there’s no room. All is not lost however; the tour would take all of 5 seconds, or however fast you could do a full turn without getting dizzy.  On Point Homevestments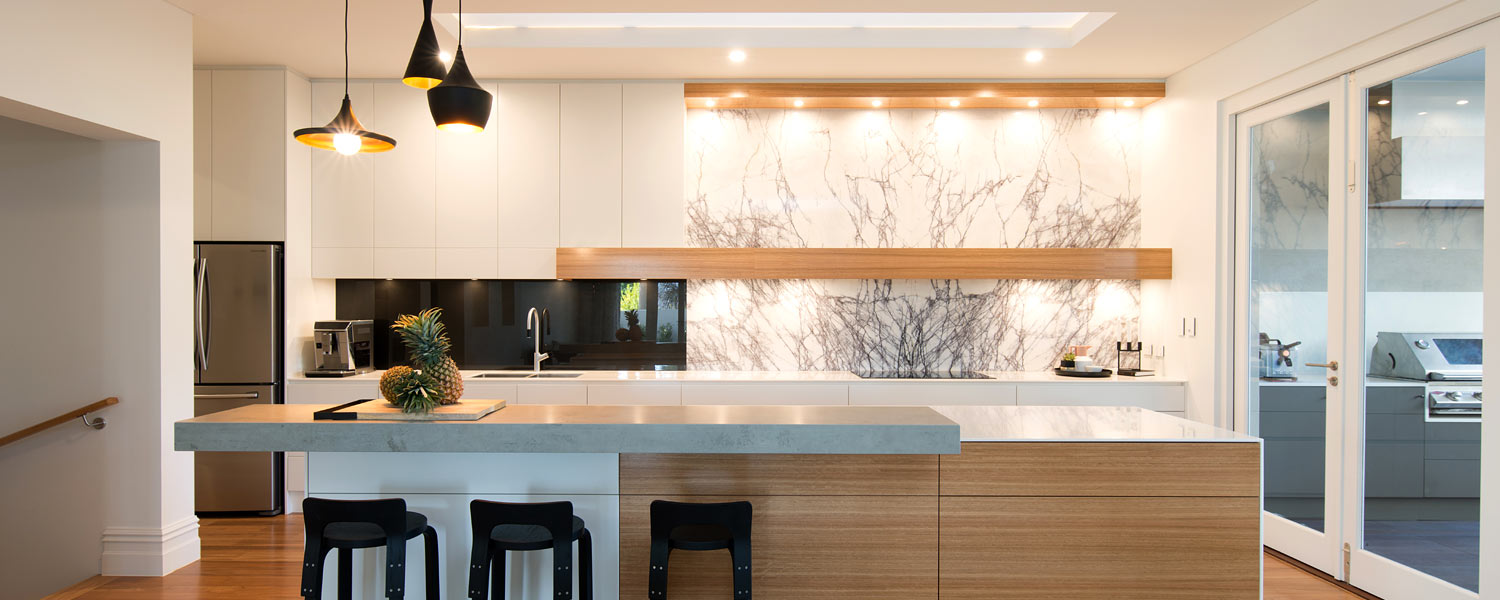 The New York Times recently ran a piece in their Ask the Contractor section (membership required to read article) about renovating for the purpose of adding value to a home. According to the contractors interviewed, the biggest bang for your buck comes from… drumroll, please… remodeling your kitchen. No surprise here since the kitchen seems to be everyone’s favorite gathering spot. Other worthwhile projects include bathroom remodel, window replacement, roof replacement, basement remodel and central air-conditioning. Of course, one should always take into consideration the location of the home when considering home improvements. For example, central air-conditioning has little value here in Seattle where the average summer temperature is in the mid-70s.  On Point Homevestments Teardowns, knockdowns, bash-and-builds vs. McMansions, pop-tops, and snout homes: It’s a war out there these days, as detailed in New York Times article that would get anyone’s heart racing — even if you didn’t own a home. What’s happening is that folks are buying homes and hoping to tear them down to rebuild bigger ones or take existing homes and morph them into McMansions, of sorts. Communities where this is happening such as Laguna Beach, Calif., Nantucket, Mass., and Ocean City, N.J., are putting their foot down and getting help from the National Trust for Historic Preservation to slow down the madness. One funny anecdote in the article dealt with a real estate agent who was given the OK to build an addition to his home in Lewes, Del., but to make room, he needed to knock down a dilapidated chicken coop on the property that dated back to the 1800’s. Thinking it would be a slam-dunk to get the go-ahead in a public hearing he was met with fierce public disapproval and did not get the OK. The reason? It lent "value to the streetscape." So, whenever you drive down the street and see a dilapidated building ready to fall over, a community ordinance could be protecting its right to stand there.  On Point Homevestments Before you start picking out tile and paint chips, be sure you know how much it will cost to remodel your houseReady for a kitchen renovation? Anxious for a bathroom remodel? The easy part is knowing your goal for home remodeling — whether you’re trying to keep up with your growing family, add office space, or increase your home’s value. But figuring out how to plan a home renovation that doesn’t break the bank can be tricky. Here are five key steps in planning your home remodeling project. 1. Estimate home renovation costs As a general rule of thumb, you should spend no more on each room than the value of that room as a percentage of your overall house value. (Get an approximate value of your home to start with.) For example, a kitchen generally accounts for 10 to 15 percent of the property value, so spend no more than this on kitchen renovation costs. If your home is worth $200,000, for example, you’ll want to spend $30,000 or less. Something else to keep in mind: Contrary to popular belief, kitchen renovations offer among the lowest return on investment, according to analysis from Zillow Talk: The New Rules of Real Estate. Every dollar you spend on a kitchen remodel increases the value of your home by 50 cents. The highest return on investment? A mid-range bathroom remodel. 2. Consider home remodeling loan options If you plan on borrowing money to fund your home renovations, there are a number of loans out there to help with just that.
Refinancing, getting a HELOC or taking out a home equity loan are all big decisions, and it can be tough to know which one makes the most sense for you. As with any new loan, consult with a lender to see which option is best for your situation. 3. Get home renovation quotes from contractors Some contractors will give you an estimate based on what they think you want done, and work completed under these circumstances is almost guaranteed to cost more. You have to be very specific about what you want done, and spell it out in the contract — right down to the materials you’d like used. Get quotes from several contractors, tossing out the bid from the one who gives you the lowest estimate. Going with this choice could be asking for problems, as low-priced contractors are known to cut corners — at your expense. 4. Stick to the home remodeling plan As the renovation moves along, you might be tempted to add on another “small” project or incorporate the newest design trend at the last minute. But know that every time you change your mind, there’s a change order, and even minor changes can be costly. Strive to stick to the original agreement, if possible. 5. Account for hidden home renovation costs Your home may look perfect on the outside, but there could be issues lurking beneath the surface. In fact, hidden imperfections are one of the reasons renovation projects end up costing more than you anticipated. Rather than scramble to come up with extra money after the fact, give yourself a cushion upfront. Factor in 10 to 20 percent (or more) of your contracted budget for unforeseen expenses, as they can — and do — occur. In fact, it’s rare that any project goes completely smoothly.  On Point Homevestments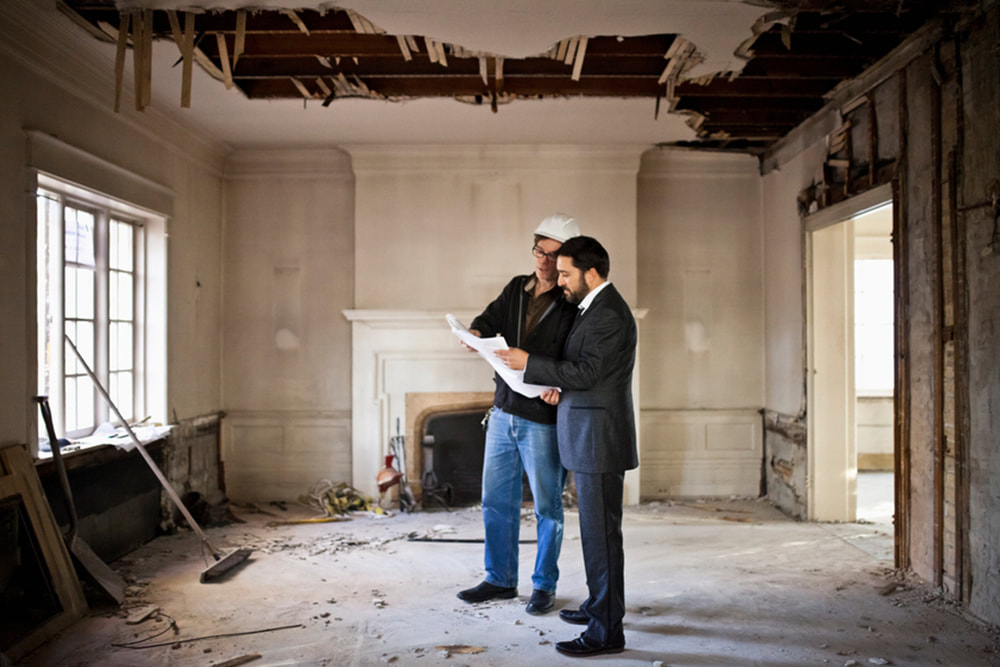 If there’s one set of real estate rehabbing tips that the would-be fix and flip investor seems to want to know more about, it’s the construction process of house flipping. That’s because many of the most common, and costliest, mistakes made when rehabbing real estate occur in that all-important construction part of an investing deal. There are many question to consider for the real estate rehabber: how do you find a contractor?; how do you know what the contractor should do?; and how do you ensure you don’t get exposed legally, and financially, when entering a deal? In the belief that the best real estate rehabbing tips are those that give you a broader sense of the rehab property big-picture, here’s a quick overview of how the construction process works, from beginning to end. Understanding The Construction Part of the Real Estate Rehabbing Process1. Creating a Detailed Scope of Work The first step of the construction process does not involve contacting a contractor or signing an agreement. It’s completing a detailed and written scope of work. The Scope of Work (SOW) is the foundation of a rehab project. In essence, the SOW is the rehab investor’s to-do list, an agreement with a contractor regarding the project’s extent and materials used. And learning how to write a scope of work is a vital part of the investor process. As Paul Esajian explains in his book “The Real Estate Rehab Investing Bible”: “A SOW minimizes miscommunications between parties and holds the contractor accountable to the agreed-upon terms and exactly what you want and need done.” A detailed and written SOW helps ensure the investor and contractor are on the same page regarding the extent of the project. An SOW also helps ensure the contractor completely knows and understands the agreed-upon deliverables. (Not always the case.) Developing a good and detailed SOW means checking out a property thoroughly and determining the priority items that need redeveloping. These items may include removing or demolishing certain features, as well as renovating or adding new items that boost the market value of a property. Once a rough SOW has been established, and meets the projections of a fix and flip investor, the next part is making the SOW as detailed as possible. A detailed SOW should include more than just numbers, but also a bid package that rehab investors send to potential contractors who might be interested in joining a project. 2. Finding a Contractor Finding a good and trustworthy contractor can make the rehab process easier and less stressful. (Not to mention save you time when it comes to sourcing your next rehab project.) Some investors, who want to save money, make the mistake of getting an inexperienced or cheap contractor, which in many cases may lead to disaster during the real estate construction process and ultimately dip into a project’s profits. While a more experienced contractor may cost the investor more upfront, chances are, the project will be finished within the deadline set and delivered with quality craftsmanship. It’s crucial an investor pre-screen a contractor for a project. How do you pre-screen? Here are a couple of key questions to ask would-be contractors:
This may seem like a lot of questions, but better to ask ahead of time –- rather than be burned later on. 3. The Bidding Process (and Choosing a Contractor) Once a fix and flip investor has identified pre-qualified contractors for the project, they can start the bidding process. The investor’s bid packet should, at the very least, include:
Invite between three to five pre-qualified contractors to provide bids on each project. The investor should inform contractors where to send bids and the specific bidding deadline. The investor should evaluate the bids based on accuracy, professionalism, as well as overall feel. (It’s okay to trust your gut, just be sure to mix it with a bit of empiric data as well.) 4. Executing the 6 Critical Documents Before a single nail is hammered, as an investor you must ensure all necessary paperwork is complete. While the contractor will be expected to provide “some” documents such as licensure and liability insurance, the investor must provide six critical documents to safeguard the project and protect all participants. These documents include:
5. Managing the Rehab Most of the work on a rehab project leads up to this moment: construction actually beginning. (And you managing the project to ensure goals are met in a timely fashion.) But don’t worry, you don’t have to know how to turn on a single power tool to manage a rehab project. In fact, the more able you are to set workflow milestones with the contractor, along with a payment schedule and time for building inspections, the less you have to do as an investor during this phase. A general recommendation is to fix the project’s exterior first, and work from the outside in. (Example: The workflow stages begin with demolition and trash removal and lead all the way to the final cosmetic touches on the property.) What’s key is that all work match the original SOW. The middle of a rehab project is not the time for improvising or changing “on the fly.” Stick with the plan, and the plan will save you money. 6. Closing the Rehab and Final Payment You’ve reached the most exciting part of a real estate rehabbing project: staging the project for selling! The goal in this stage is to make the project appealing to as many prospective buyers as possible. Staging techniques should include a walk-through with the contractor to make sure all deliverables in the final punch list have been addressed and completed. This is also the stage to schedule final inspections needed to close out the building permits of a project. At this point, you should also be ready to provide the final lien waiver and payment to the contractor. (And take possession of a great-looking property which you can now sell. Don’t Need to Pick Up a Single Hammer Construction can be an overwhelming part of the rehab process for the new (ish) rehab investor. It’s important, when scouring for the latest real estate rehabbing tips, to remember your job is not to pick up a single hammer or lay a piece of drywall. As a rehab investor your job is to have a clear vision of a project: what needs to be done, when and how to keep the project from straying off-course. Don’t worry if you don’t know how every aspect of a build is performed. Your primary task is to stick to your guns, point out anything that doesn’t meet your SOW, and sign off on the deal only when it reaches your expectations. Do this and you’ll not only feel less stressed, and be more respected, but you’ll increase the likelihood of you realizing a profitable deal.  On Point Homevestments |
Archives
February 2019
Categories
All
|
 RSS Feed
Company |
Services |
|
Possibilities